Use this guide to connect Microsoft Copilot Studio (Power Platform) to your eGain MCP server. You add the MCP tool to a Standard Agent so the agent can search and act on your eGain knowledge.
- An eGain Knowledge tenant. If you do not have one, sign up for a free trial of AI Knowledge Hub or AI Developer on eGain.com, or ask your eGain administrator to create an account for you in your team's existing tenant.
- Administration Console access for the partition you want Copilot Studio to read from (needed to enable Remote MCP).
- Copilot Studio access with permission to create Standard Agents and add tools. MCP access mirrors your eGain user's permissions — Copilot Studio can only access the portals and articles that your eGain user account can access.
Contact Support before you set up Remote MCP For versions 21.24 and earlier, Remote MCP is not available in all customer environments. Contact Support to enable Remote MCP for your tenant or to confirm availability for your environment.
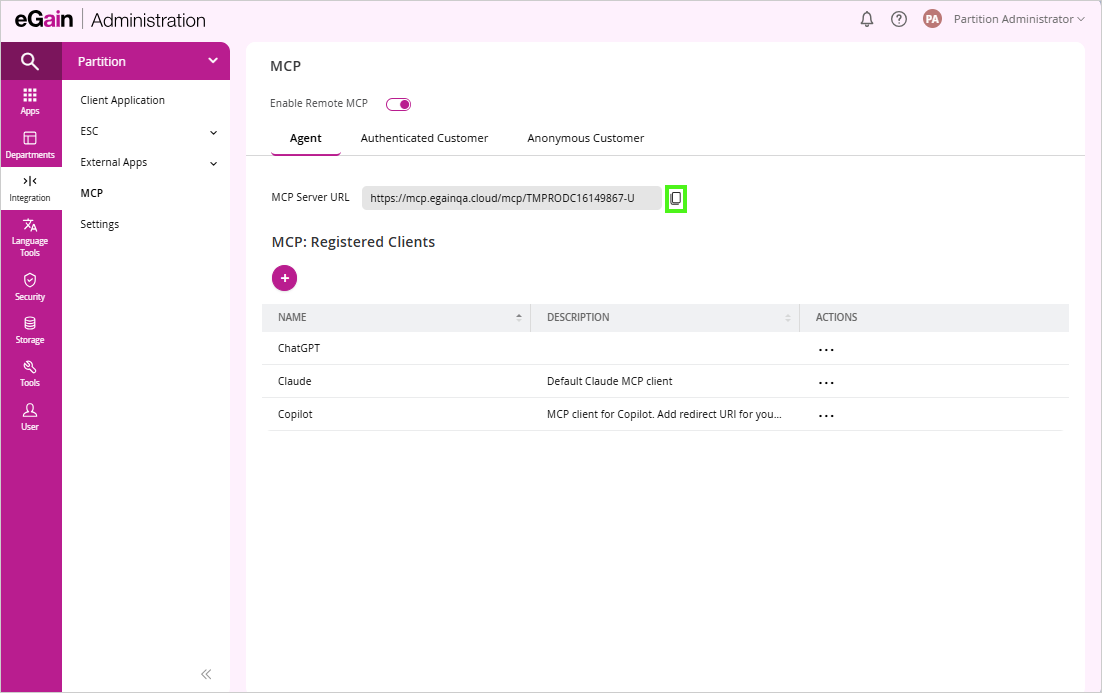
- Sign in to your eGain Administration Console. Your tenant URL follows the pattern
https://<your-eGain-hostname>/<your-tenant-id>— for example,https://ai.egain.cloud/a1b2orhttps://aidev.egain.cloud/a1b2. - Go to Partition → Integration → MCP.
- Turn on the Enable Remote MCP toggle.
- Select one of the available tabs for your use case:
- Agent: for agent-only MCP access.
- Authenticated Customer: for authenticated customer access.
- Anonymous Customer: for anonymous customer access.
- Click the copy icon next to the MCP Server URL field to copy the URL. You will paste this into Copilot Studio in the next step.
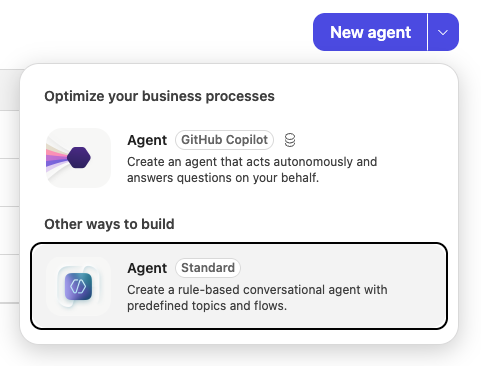
- Open Copilot Studio and go to the Agents tab. Click the dropdown beside New Agent, then select Agent (Standard).
- Name your agent and complete the initial setup.
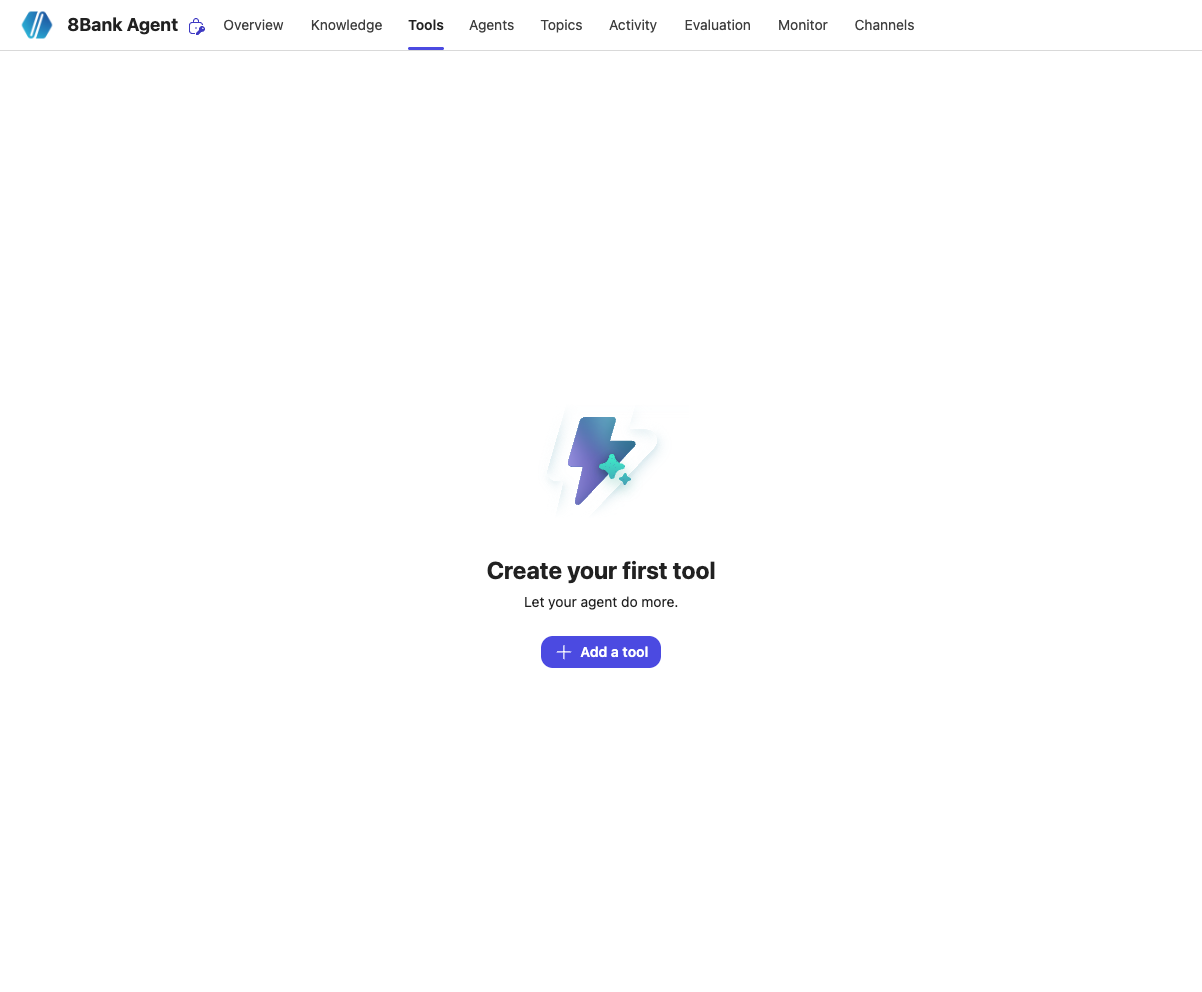
- In the top navigation bar, go to Tools and click Add a tool.
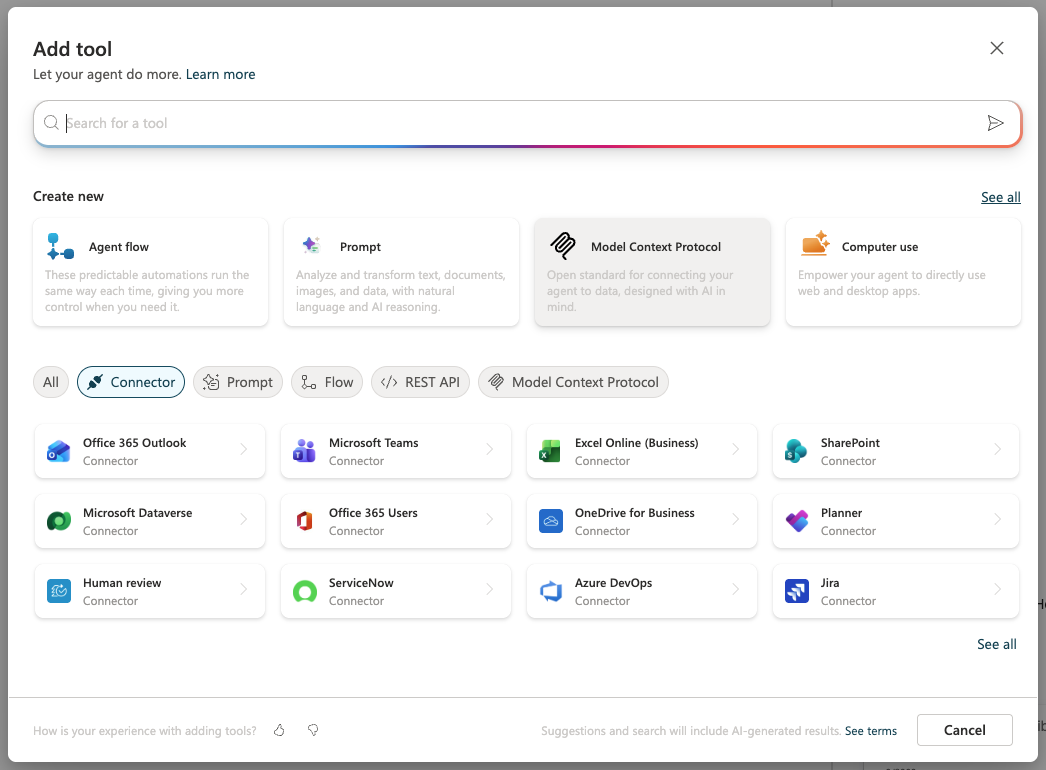
- In the popup, select Model Context Protocol.
- Enter a tool name and paste the MCP Server URL you copied from the Administration Console into the URL field.
- Set Authentication based on the MCP URL you copied:
- Anonymous MCP URL: set Authentication to None, then save. You can skip the remaining steps in this section.
- Authenticated MCP URL: set Authentication to OAuth 2.0 and Manual, then continue below.
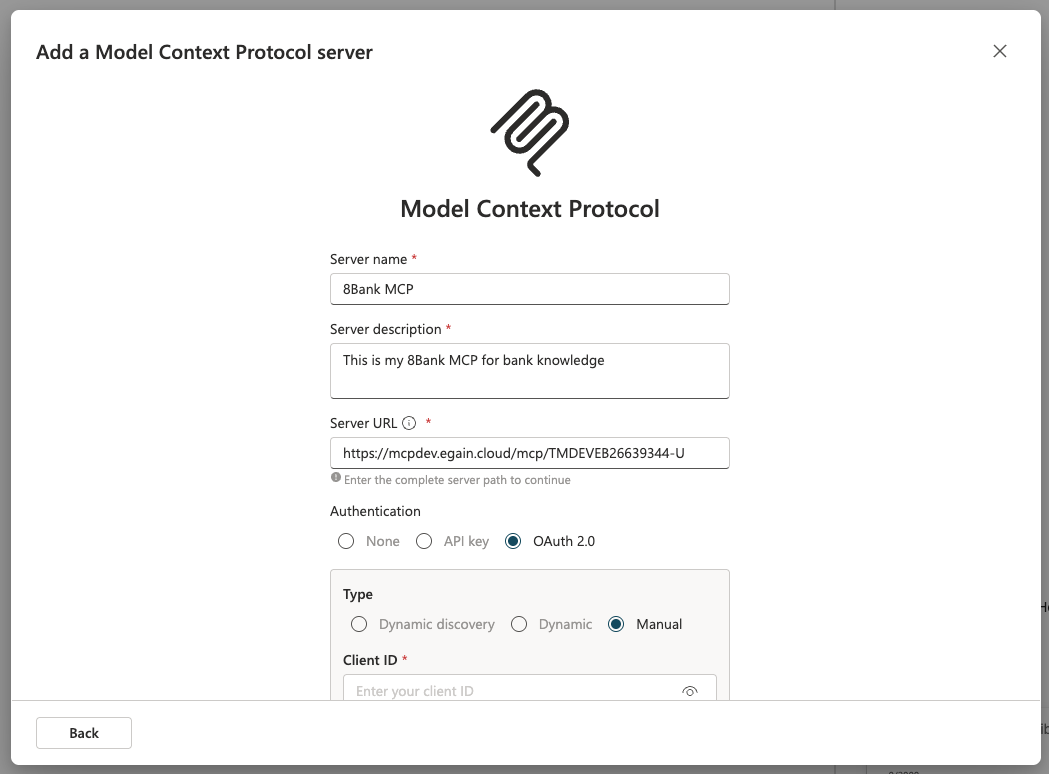
- In the eGain Administration Console, register Copilot Studio as an MCP client:
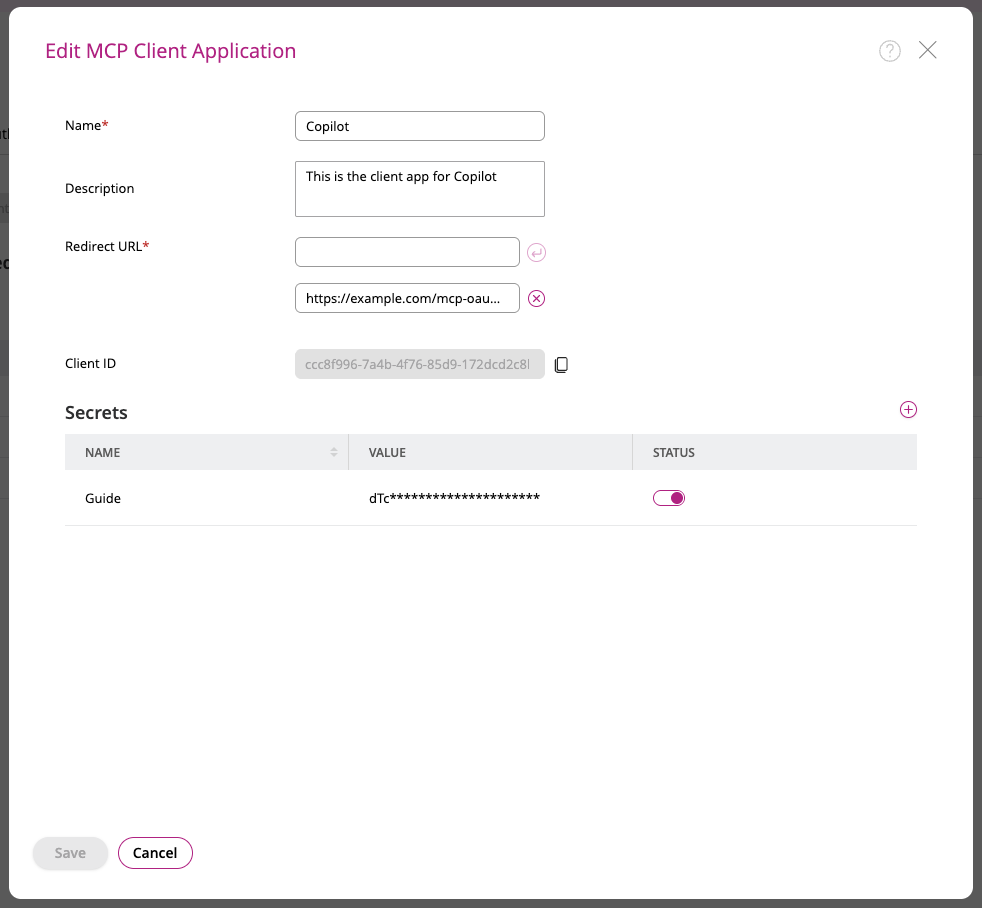
- Browser to Integration > MCP. On the Agent tab, click Add.
- Enter a Name (for example, Copilot), a Description, and a temporary https:// URL in Redirect URL. Click Save.
- Copy the client credentials from eGain into Copilot Studio:
- Under MCP: Registered Clients, click Options > Edit for the Copilot client. Copy the Client ID.
- In the Secret section, create one with a Name and turn on the Status toggle.
- Copy the secret value right away, because it is not displayed again. Click Save.
- Return to the Copilot Studio agent and paste the client ID and client secret into their respective fields.
- Return to the eGain Administration Console and navigate to the Client Application page, click Metadata to open your OAuth endpoints. See Find Your API Endpoints (Metadata) for details.
Copy these values into the Copilot Studio MCP configuration:
- Authorization URL — from Authorization URL in Metadata
- Token URL — from Access Token URL in Metadata
- Refresh Token URL — use the same value as Access Token URL
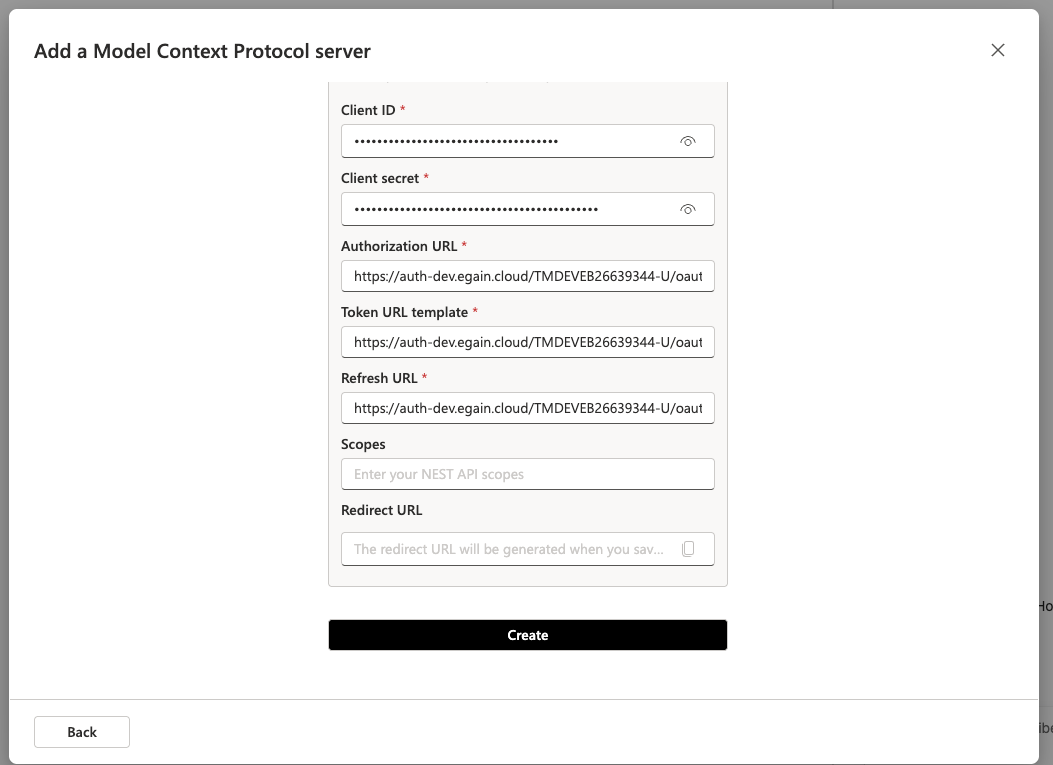
- Save the MCP tool in Copilot Studio. Copilot Studio now displays the redirect URL. Copy it, return to the eGain registered client, replace the temporary Redirect URL with Copilot Studio's value exactly, and save.
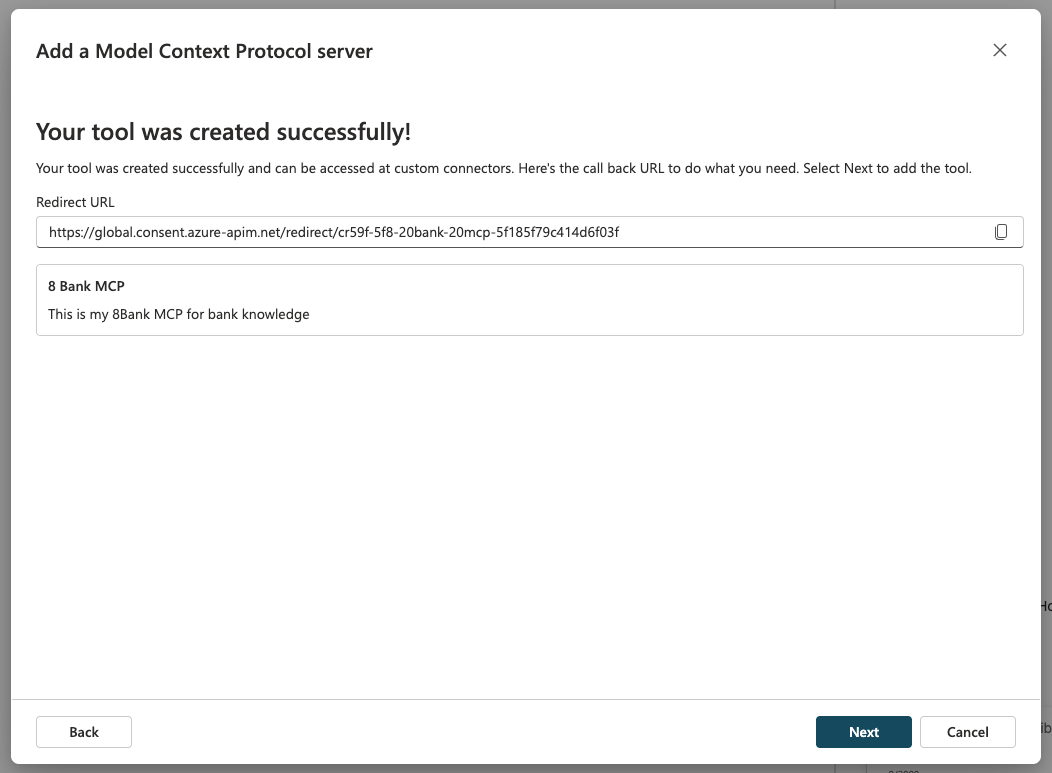
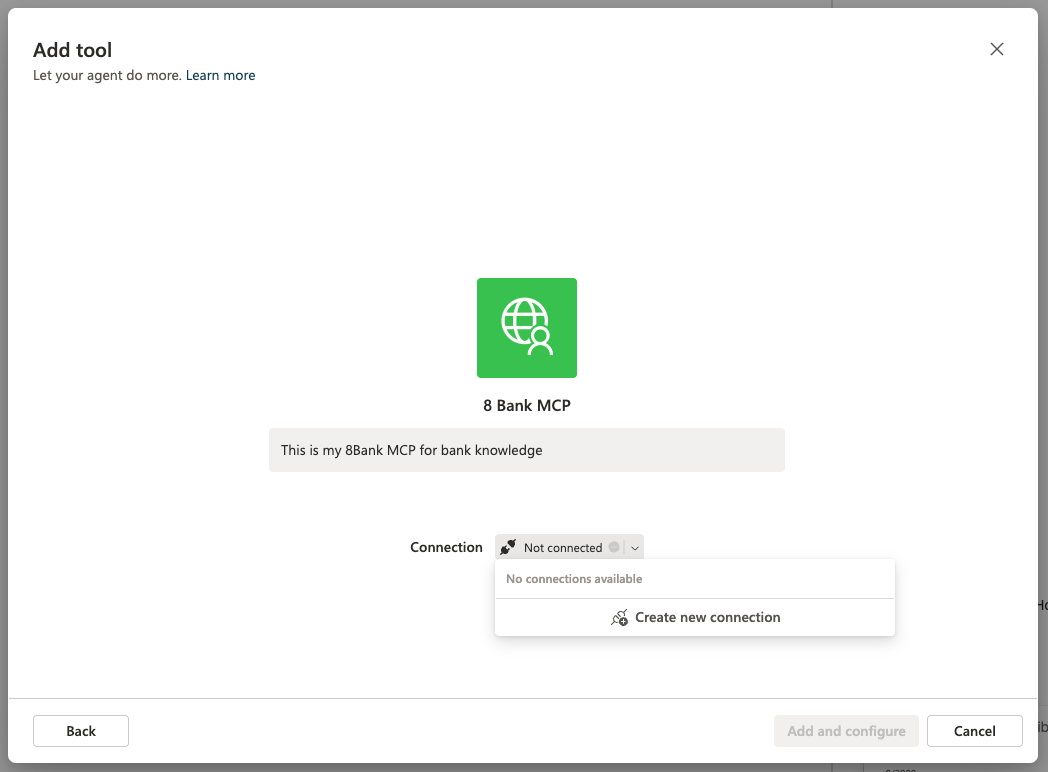
- In Copilot Studio, click Create new connection. Sign in with your eGain account when prompted. After successful login, the connection is ready and you can Add and configure the MCP to your agent.
For Copilot Studio MCP and agent details, see Microsoft's Model Context Protocol in Copilot Studio documentation.
Open your agent in Copilot Studio and ask something like:
"What does our master knowledge base say about refunds?"
- Authentication: Copilot Studio authenticates using OAuth 2.0 with your eGain account. Copilot Studio never sees your account password.
- Visibility: Copilot Studio can only see the portals and articles your eGain user is allowed to see.
- Revoking access: Revoke access at any time from Copilot Studio by removing or updating the MCP connection, or from your eGain account settings.
- Anonymous access: If your portal allows it, you can skip sign-in entirely. Copilot Studio will see only what unauthenticated visitors see on your portal.
- Connection fails after OAuth setup. Verify the Authorization URL, Token URL, and Refresh Token URL match the values in your registered client's Metadata. Confirm the Redirect URL in eGain matches the redirect URL from Copilot Studio exactly.
- Anonymous MCP still prompts for sign-in. Confirm Authentication is set to None in the Copilot Studio MCP configuration.
- "No portals found". Confirm that the eGain account you signed in with has access to at least one portal.
- Changed eGain tenants. Remove the MCP tool and reconnect using the new tenant's MCP Server URL.
- Sign-in loop in the browser. Disconnect the connection and recreate it, or try a private window or a different browser.
For more issues, see the MCP Troubleshooting guide.
- Support: For issues not covered above, Contact Support.
- Privacy: eGain Privacy Policy